In yesterday’s stream @Metaphoria expressed interest in how I created some cement containers. Here are some of them with some comments and tips on how to get started.
All are structurally sound - probably equally or more than a ceramic pot.
First some definitions: You need 3 basic ingredients. Cement, water and an aggregate. If the aggregate is sand, the final product is usually referred as mortar. If it were rocks it would probably be called concrete but the terms cement and concrete end up being used interchangeably. Now, you want to use the finest possible aggregate. When I make the mortar mix myself, I use fine silica sand. You can then use general use portland cement that is a bit grey or white Portland cement. The usual proportion is 2 parts in volume aggregate to 1 part cement. As for the water, as little as needed. As you start mixing mortar you will find out how little water you need to add. Water is essential as it reacts chemically in an exotermic reaction with the cement to product the crystallized material that is a rock. So cement cures with time and it needs to loose the excess water slowly. If you add too much water it will make the final product weaker structurally.
Or you can use ready made mortar.
On all of the examples below I am using rapid set mortar mix. With this rapid set mortar, it sets in about an hour. You need to keep working the mix to keep it malleable and not to set (that is why cement trucks turn…)
Additionally, I add a number of additives. Two additives are essential.
First, a polymer fibre (alternatively you can also use Alkali resistant glass fibre or GF for short). This embeds itself in the structure of the cement and turns the cement into a mesh of interconnected areas, this is crucial for structural strength. In the end, the container is furry with polymer fibres sticking out of the surface everywhere. I use a torch to burn them away before sealing the container. I don’t have experience with GF but it could at least be sanded away if it appears in the surface.
The second add mix is a super plasticizer (SP). I use ADVA 555 but there are many other brands. What this product does is magic. It turns the mortar which normally is a quite grainy into a malleable pizza dough consistency. Also, by mixing some of the super plasticizer in you use less water and thus end up with a stronger material. If your main batch starts to set and you need a bit more time, then you can add a tiny bit more of SP and work it back into a malleable consistency. With the rapid set mortar, I have about 10 minutes creating the mix, then about 20-30 minutes working with the the material. During this 30 minutes, first I I can tuck it, spread it, mold it just like playdoo then a bit harder clay. Then it starts to set, at this time I can use a chisel and sculpt it almost like you can see Jonathan Cross doing it in the feature content Mirai video. After it sets in about 1 hour you can already work on it again. It will keep curing and will reach its maximal strength in about a month but it is essentially unbreakable already then. Be careful with the SP. Only a little bit is needed or your mix will flow like water. You want enough water that it is clear that all the cement is hydrated but not more. The mix will feel like chocolate chip cookie dough, humid but crumbling. Once you add the SP and work it, it will magically transform into this thick paste. You need some 10-20ml for a whole litre of mortar (sorry I refuse to learn volumetric imperial units - other than a pint of course) so half a shot glass for about two pints… ![]()
Another add mix that I use is an air entrainer. This creates micro bubbles in the mix that further help with strength and freeze/thaw resistance. I need to note however that I did extensive tests last winter with freeze thaw cycles with pieces without the air entrainer and had no problems so I don’t know if it is essential.
One thing I forgot to mention is pigments. I use powder pigments integrally mixed in the cement. I add them at the end when the material is already mixed with water as opposed to adding the powder to the dry mix. This is because only when wet you see the real colour. Also when your cement dries it has a different more tamed colour.
I really like the wet vibrant colour look and to keep it I use a sealer that gives a wet look. If you don’t seal the concrete you need to leach it with water to remove as much as possible of the alkaline chemicals that will otherwise raise the pH of the substrate and be detrimental to the roots. I read that washing the container some 10 times with a lot of water or keeping it submerged for a few days (replacing the water a number of times) is enough. I never had any problems with my containers but I seal them. Speaking of sealers, I like the wet look sealer but there are also natural look sealers.
Most of the stuff I made has a wire mesh frame inside and it is really easy to sculpt the mortar inside even in vertical and weird angles. For smaller pots or slabs I don’t use any internal frame. This material is incredibly strong but you need a minimum thickness of about 0.5 cm in smaller pieces or at least 1 cm to 1.5 cm in bigger ones.
The problem with cement is that it is not light. I am starting to experiment with using perlite in the mixture with good results.
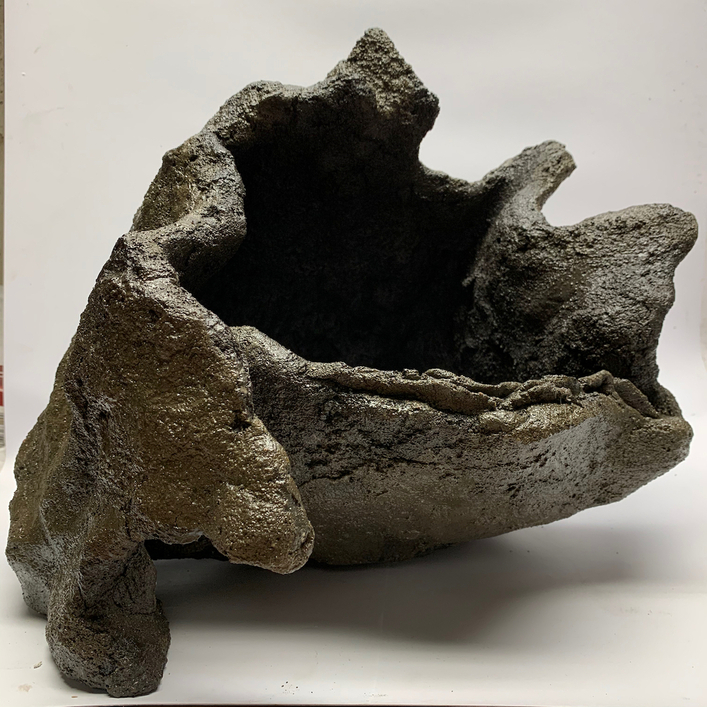
This latest one has a core made with 1 part mortar, 3 parts perlite (and all other additives above). After the core dried, I covered the inside and outside parts with mortar (no perlite but all additives). It weights 7 kg (~ 14 lb) , it is about 1 cubic ft in volume and fits a soccer ball inside. I will continue experimenting with perlite as it considerably lightens the design, adds more thermal stability (so it serves as a buffer in summer and winter) and only slightly affects strength for the purposes of bonsai.
Here is a slab. It is about 1 cm thin in some places. 2 ft long by 1 ft wide, weights 6 kg (~ 12 lb).

More photos here.
Here’s a small pot without a wire mess. Also notice that I decided to not have drainage holes in it, instead I have lateral drainage slits. I like this concept and will explore it more in the future.

I also like the offset smaller base of the pot. More photos here.
Here’s a rounded slab. The details on the surface come from covering the curing mortar before it reaches the stronger sculpting consistency with parchment paper. Here are more pictures of this slab.
The parchment paper wrinkles up with moisture and it creates this amazing patterns. If you use parchment paper be careful to use a single sheet of paper or if you cut it, to put the pieces in the same orientation as the paper existed originally, sort of ‘following the grain’ of the paper or you will end up with patterns running in weird non natural relative orientations as in this slab (at least these are in the part that will contain soil so it is still usable from both sides).

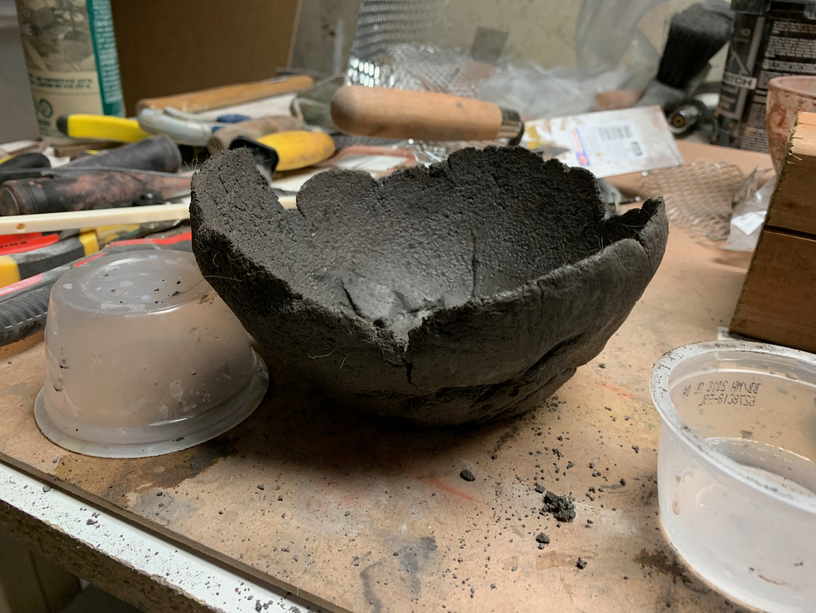
Here is another pot without mesh made with a mold while the cement was just mixed and still a bit flowing, it created a flower shape.

Here is a another small pot that I made with the leftover from the the dark thin slab at the top. It uses the same mold as the flower pot above but when it was not flowing. I used a pizza roller to create a flat circular slab on top of parchment paper, put the mold and turned it upside down, removed the paper and set the mortar to the shape of the mold. I then used a rock to create some patterns on the outside and deformed it a bit to make it more asymmetric. The picture is not of the finished pot but it allows you to see how the colour change without sealer.
Here is another pot without mesh, I added the material when is it starting to set around a cardboard box. Once it got too the state when it can be chiseled, I did so to create more straight walls. I decided to leave the chisel marks and add additional one on the surface so it looks like a piece of stone from a quarry. Notice also this one also doesn’t have drainage holes, it has too slits.

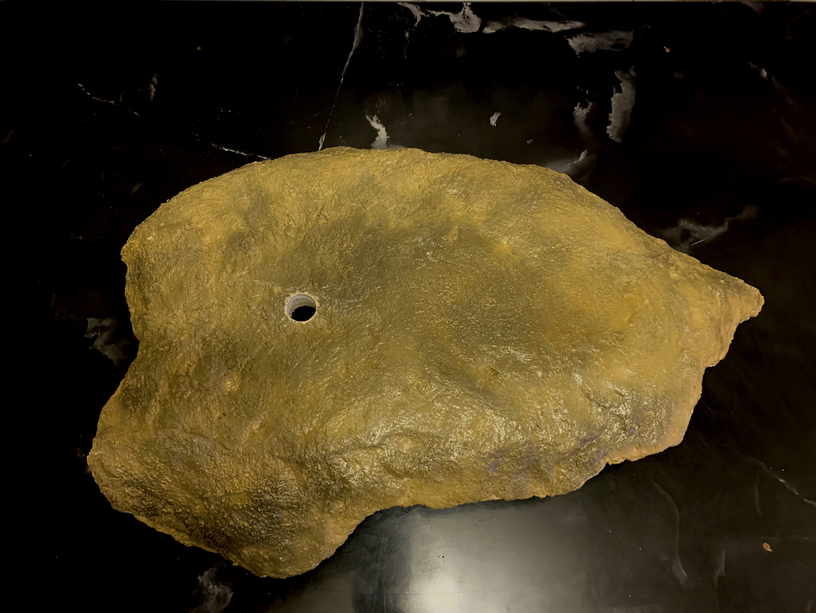
Here is a rounded slab. I poured the still flowing cement over the rounded base. It has no mesh and it was made with white portland cement instead of the rapid set mortar. The colour is a bit if a green with shades off yellow and blue and the pattern is from the parchment paper. It is very light, probably less than 2 kg. It is very thin, around 1 cm, and in terms of dimensions, around 1ft by 1 ft. It has not feet so it wobbles left to right (why not?, trees are tired to be immobile and one told me they want to move).

As you can notice when the surface is covered (either plastic, aluminium paper or parchment paper) it cures too a smooth surface, when it cures exposed it has this rougher appearance.
All these pots can be drilled really easily so wire attachment holes, at least for the first tree we plant to use it for, can be drilled only at the time of planting.
I am still experimenting with cement. In particular, I want to start to experiment mixing mortar or cement, perlite and epoxy to see if I can get even lighter while still strong materials - perhaps not unlike what Jan Culek developed. I am happy to share all I have learned here. I think that it is unfortunate and really a pity that cement and aggregates containing it is not more widely used to create bonsai containers. It is such a versatile material and because it doesn’t need to be fired, it may in principle be used to create strong containers with additional materials such as wood or glass in them that could not be made with ceramics. We need more exploration and not necessarily simply trying to imitate what can be done best with ceramics or to create natural looking slabs or rocks. We can create art objects on which we plant trees to create bonsai art. I leave you with this video from the sculptor Katherine Stanek that was a great source of inspiration to me.

Hope this helps.
r.